
Are you looking to enhance the user experience in Looker Studio by customising the navigation menu? The navigation menu serves as a central hub for users to access their reports and dashboards, and personalising it can greatly improve their navigation experience.
In this tutorial, we’ll guide you through the steps to customise the navigation menu in Looker Studio, allowing you to create a seamless and intuitive user interface.
Header Outline:
I. Introduction
II. Customising the Navigation Menu in Looker Studio
A. Accessing Looker Studio
B. Customise Fonts, Background Colours and Text Colours
C. Navigating to the Navigation Menu Editor
D. Adding Pages, Dividers And Sections To The Menu
E. Moving Pages, Sections Or Dividers Up Or Down The Menu
III. Best Practices for Customising the Navigation Menu
IV. Conclusion
I. Introduction
The navigation menu in Looker Studio plays a crucial role in helping users navigate through dashboards and explore data. By customising the navigation menu, you can create a personalised and efficient user experience. In this guide, we will walk you through the steps to customise the navigation menu in Looker Studio, enabling you to optimise the navigation flow and tailor it to your specific requirements.
II. Customising the Navigation Menu in Looker Studio
To customise the navigation menu in Looker Studio, follow these steps:
A. Accessing Looker Studio
- Log in to your Looker Studio account.
- From the Looker Studio home page, select the report that contains the dashboard with the navigation menu you want to customise.
- Open the report by clicking on its name.
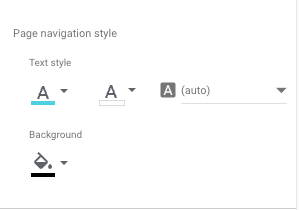
B. Customise Fonts, Background Colours and Text Colours
- Go to “File”, then “Theme Layout” and click on “Customise” and scroll down to the very bottom.
- Adjust your desired colours and font.
- Scroll back up to the top and click on the “X”.
- Then click on the “Layout” tab and choose which Navigation type you want.
- Click on the “X” to close.
C. Navigating to the Navigation Menu Editor
- Go to “Page”, then “Manage Pages” to open the “Report Pages” screen on the right hand side.
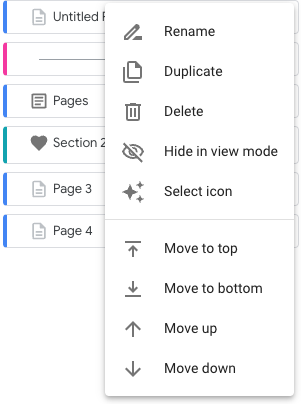
- Hover over the pages you want and click on the three dots on the right hand side of the page and click on “Rename” to rename the page.
- Click on the three dots on the right hand side of any of the pages and click on “Select Icon”. Choose which item you want for the page.
D. Adding Pages, Dividers And Sections To The Menu
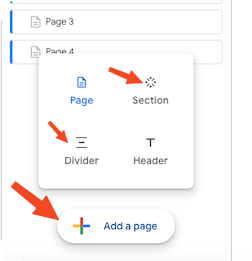
- To add a new page, hover over the “+” sign down the bottom and click on click on “Add A Page”.
- To add a divider, hover over the “+” sign down the bottom and click on click on “Divider”.
- To add a section, hover over the “+” sign down the bottom and click on click on “Section”.
E. Moving Pages, Sections Or Dividers Up Or Down The Menu
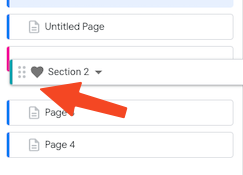
- Hover over the left hand side of a page until you get the 4 pointed arrow and drag a page up or down.
- Or alternatively, you can hover over the right hand side of the page, click on the 3 dots, and then click on “Move To Top”, “Move To Bottom”, “Move Up” or “Move Down”.
- The Sections Or Dividers can also be moved up or down the say way as above.
III. Best Practices for Customising the Navigation Menu
Consider the following best practices when customising the navigation menu in Looker Studio:
- Keep the menu structure organised and intuitive, aligning it with the users’ needs and workflows.
- Use clear and concise labels for menu items to ensure easy navigation and understanding.
- Regularly review and update the navigation menu to reflect changes in your data and users’ preferences.
IV. Conclusion
By following the steps outlined in this guide and adhering to best practices, you can successfully customise the navigation menu in Looker Studio.
Personalising the navigation menu allows you to create a tailored user experience and optimise the navigation flow within your dashboards. Remember to keep the menu organised, use clear labels, and regularly review and update the menu as needed.
With a customised navigation menu, you can enhance the usability and effectiveness of your Looker Studio dashboards for seamless data exploration and analysis.