Do you want to fine-tune the tracking of user sessions in Google Analytics 4? Adjusting the web session timeout allows you to tailor the duration of user sessions, capturing data that accurately reflects how visitors interact with your website.
In this tutorial, I’ll walk you through the steps to adjust the web session timeout in Google Analytics 4 (GA4), empowering you to optimise your analytics setup and gain more meaningful insights into user behaviour.
- Introduction
- Step 1: Access the GA4 Property Settings
- Step 2: Adjust the Session Timeout
- Step 3: Save and Apply the Changes
- Testing and Monitoring
- Conclusion
Introduction
The web session timeout is the duration of inactivity after which a user session is considered ended in Google Analytics 4 (GA4). By default, GA4 sets the session timeout to 30 minutes, and the engaged sessions to 10 seconds.
However, you may need to adjust this timeout based on your website’s unique requirements and user behaviour. This guide will walk you through the process of adjusting the web session timeout in GA4.
Step 1: Access the GA4 Property Settings
- Sign in to your Google Analytics account and navigate to the GA4 property for which you want to adjust the session timeout.
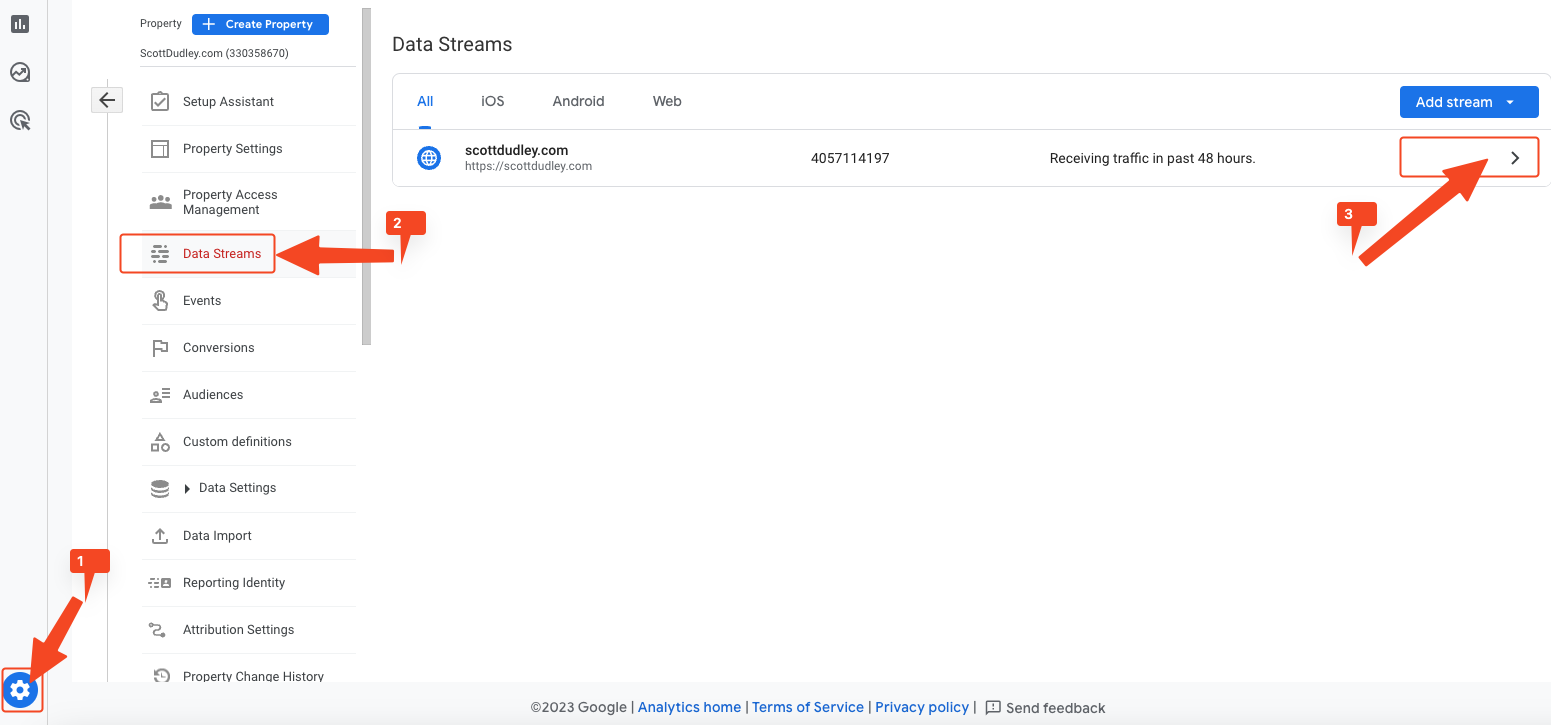
- In the left-hand menu, click on “Admin” to access the Admin settings.
- Under the “Property” column, click on “Data Streams.”
- Select the appropriate data stream for your website by clicking on the right-handed arrow.
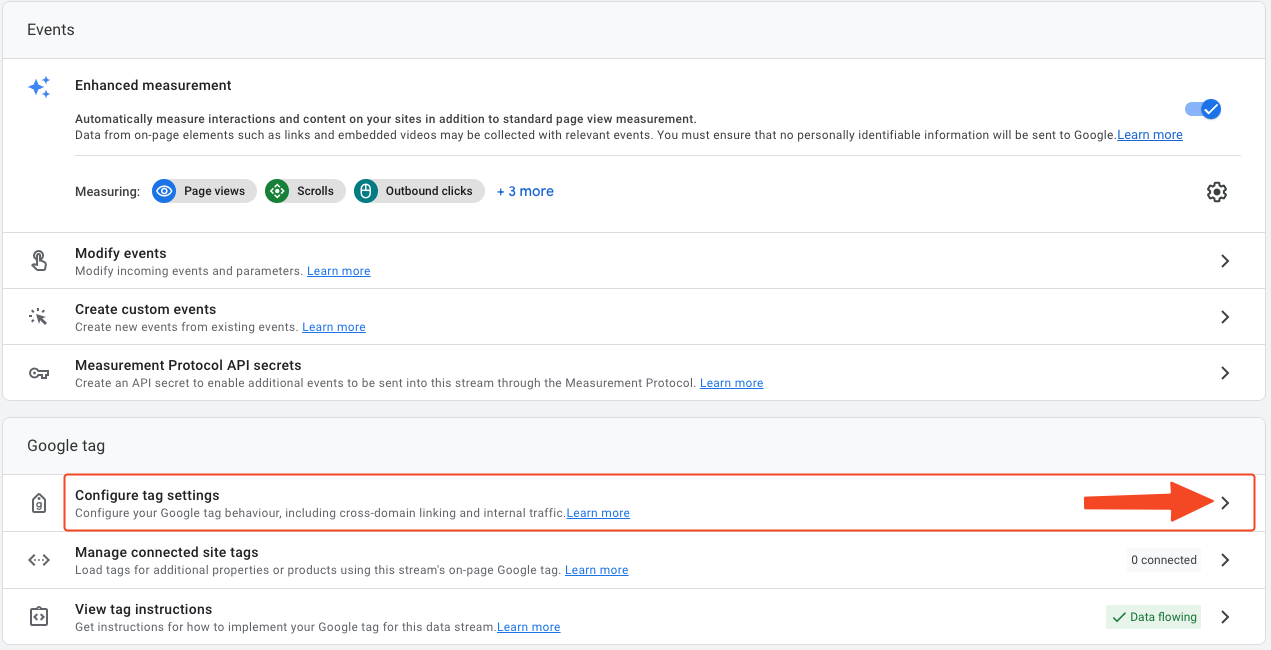
- Under the “Google Tag” section, click on “Configure Tag Settings.”
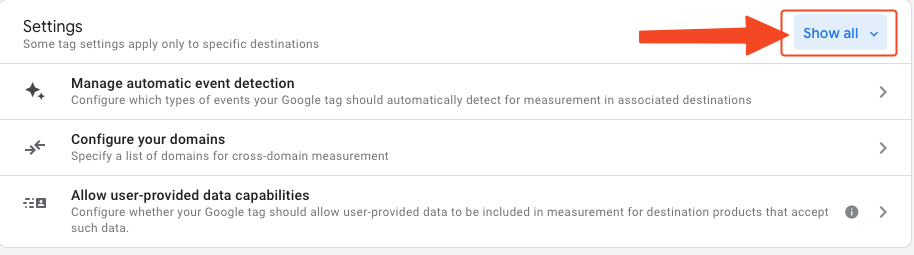
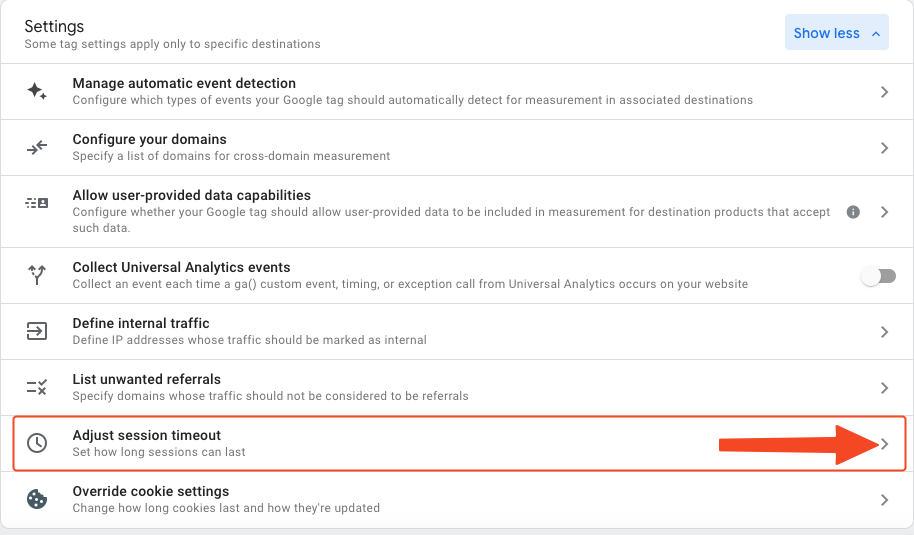
- Then under “Settings,” click on “Show All.”
- Then click on the right-handed arrow for “Adjust session timeout.”
Step 2: Adjust the Session Timeout
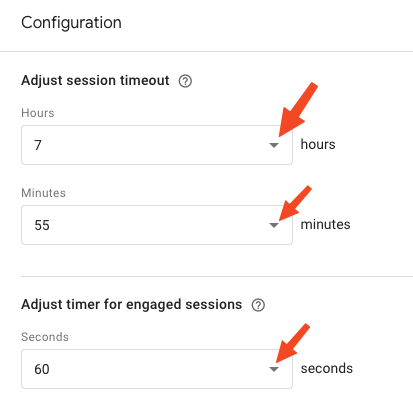
- In the “Session Settings” section, you will see the “Web session timeout” and “Timer for engaged sessions” options.
- Click on the drop-down menu to view the available session timeout options for both.
- Select the desired session timeout duration that aligns with your website’s requirements. My recommendations are to set the maximum amount for each option, which is 7 hours and 55 minutes for the session timeout and 60 seconds for engaged sessions. This is because most people leave browser tabs open and come and go from GA… which means if they come back 4 times in the same day you want it to show one session and not four. The default options are way too short in my opinion.
Step 3: Save and Apply the Changes
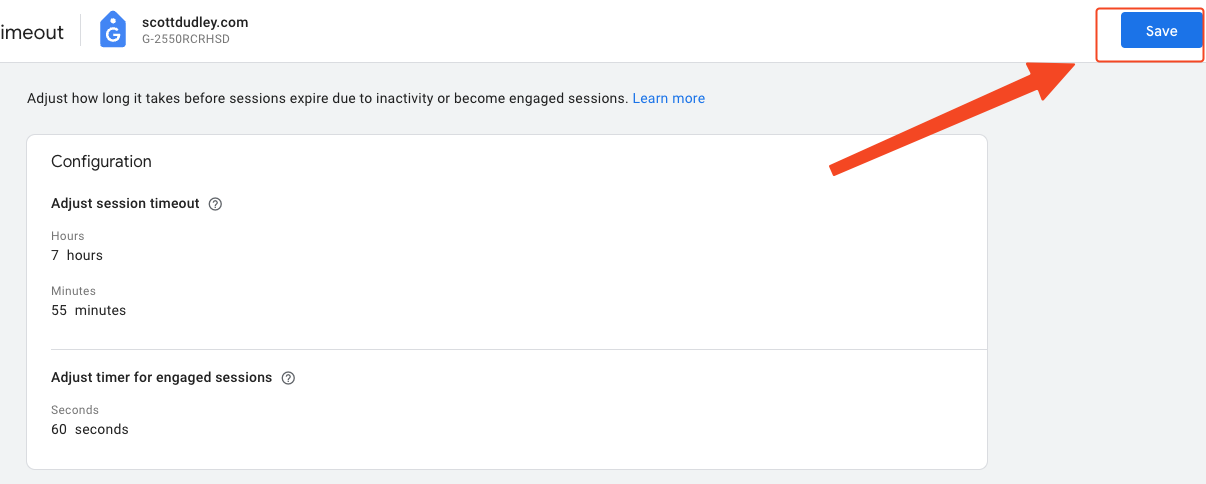
- After adjusting the session timeout, click on the “Save” button to save your changes.
- The new session timeout will now be applied to your GA4 property, and user sessions will be tracked accordingly.
Testing and Monitoring
After adjusting the web session timeout, it is essential to test and monitor the impact on your GA4 data. Verify that user sessions are being tracked correctly and that the new session timeout aligns with your expectations.
Monitor user behaviour and engagement metrics to ensure the session timeout is suitable for your website’s specific needs.
Conclusion
Adjusting the web session timeout in Google Analytics 4 allows you to tailor the tracking of user sessions based on your website’s requirements. By following the steps outlined in this guide, you can modify the session timeout duration to better capture user activity and engagement.
Analyse the impact of the adjusted session timeout on your GA4 data to gain valuable insights into user behaviour on your website.