Are you looking for a streamlined way to manage and transfer Google Tag Manager containers? The import and export feature in GTM allows you to seamlessly migrate container configurations, share containers with collaborators, or maintain consistent setups across different accounts or environments.
In this tutorial, I’ll walk you through the steps to import and export GTM containers, enabling you to efficiently handle container configurations and enhance your tag management efficiency.
Header Outline:
I. Introduction
II. Exporting GTM Containers
A. Selecting the Container to Export
B. Downloading the Exported Container
III. Importing GTM Containers
A. Choosing the Container To Import into GTM
B. Downloading the Exported Container
IV. Transferring GTM Containers
A. Sharing Exported Containers with Collaborators
B. Importing Containers from Shared Files
V. Conclusion
I. Introduction
Managing Google Tag Manager (GTM) containers efficiently involves the ability to import and export containers. This allows for seamless sharing, collaboration, and backup of tracking configurations.
II. Exporting GTM Containers
Exporting GTM containers allows you to create backups, share configurations with collaborators, or transfer setups between accounts. Here’s how:
A. Selecting the Container to Export
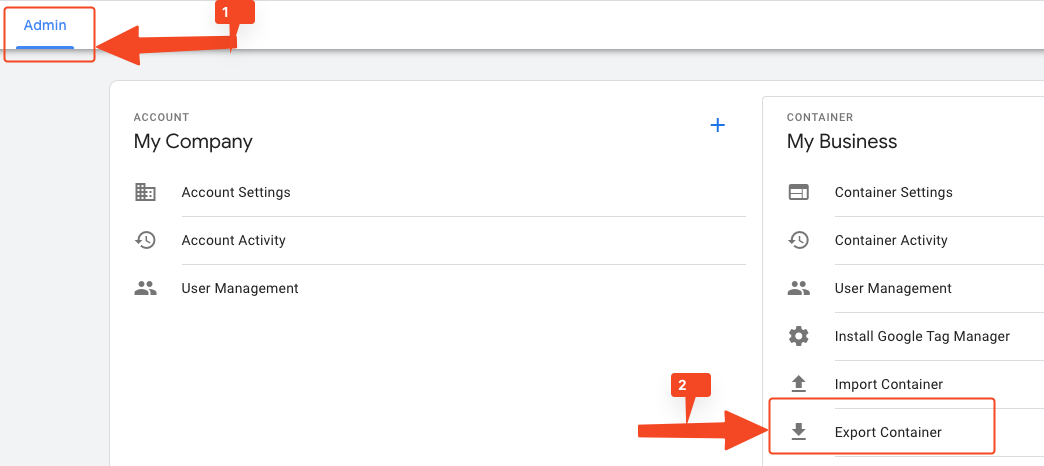
- In your GTM account, go to the Admin section and click on “Export Container”.
B. Downloading the Exported Container
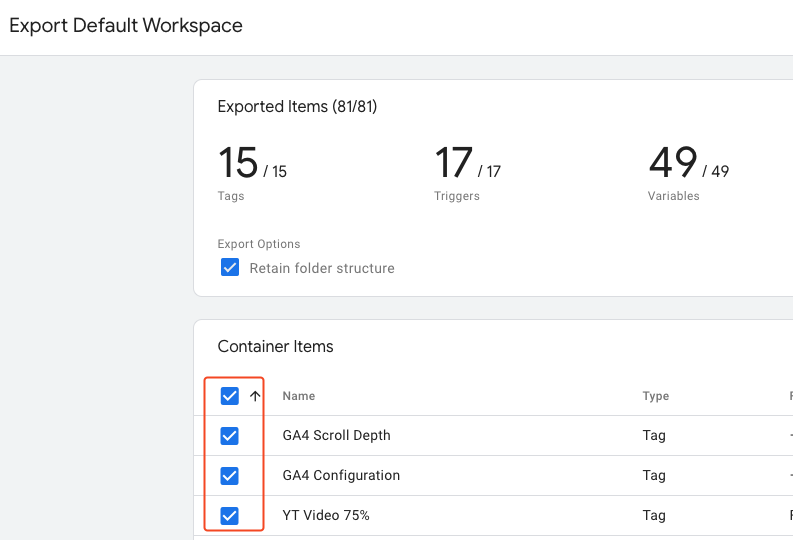
- Choose which Workspace or version you want to export.
- Choose which tags, triggers and variables you want to include in download.
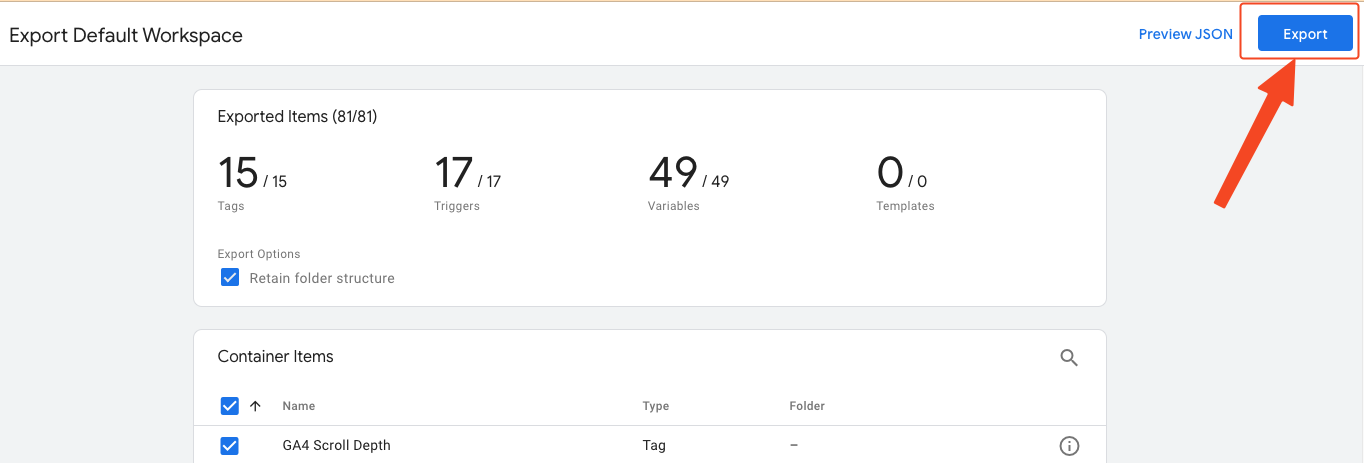
- Once happy with sections click on “Export” in the top right hand side and the .JSON file will be downloaded to your computer.
III. Importing GTM Containers
To import a GTM container from another account or source, follow these steps:
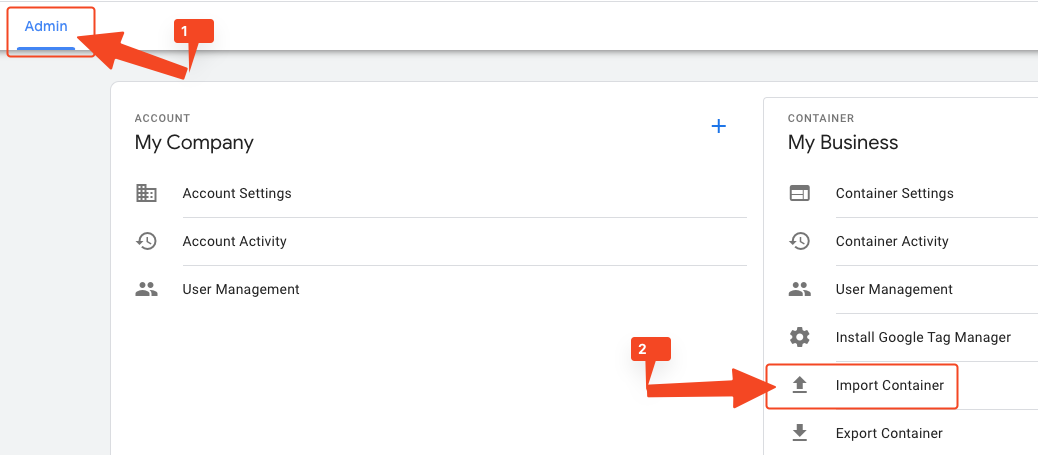
<h4id=”Choosing the Container To Import into GTM”>A. Choosing the Container To Import into GTM
- In your GTM account, navigate to the Admin section and select “Import Container.”
- Choose an exported container JSON file from your computer and follow the prompts to import the container.
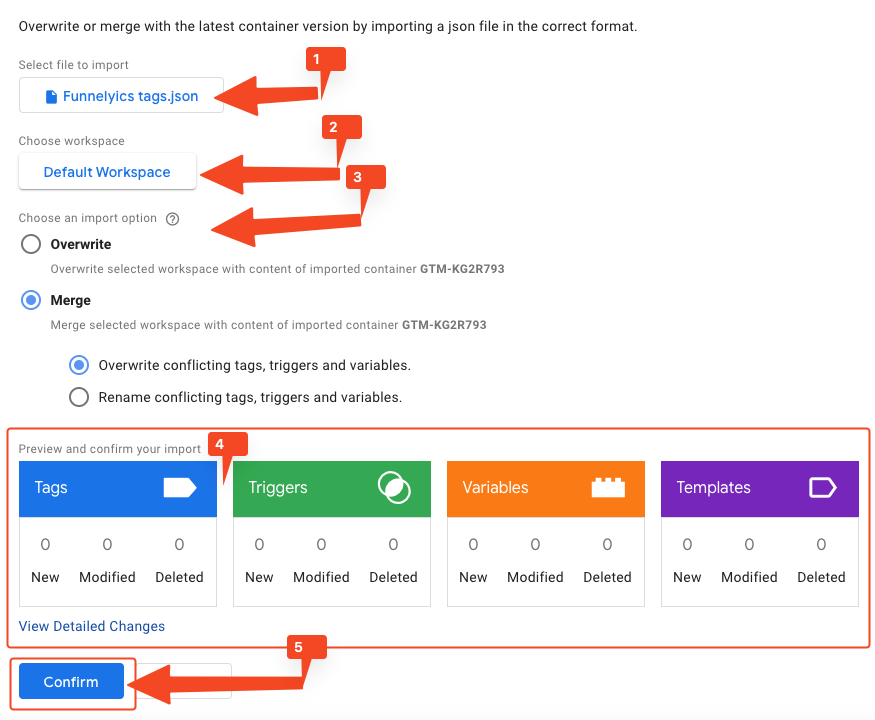
B. Finalise Settings For Importing the Container into GTM
- Choose Container file from your computer to import.
- Choose the Workspace where you want to import the file into.
- Choose an import option. Keep in mind if you choose “Overwrite” you will lose ALL the current contents in your Workspace. So in most cases you will want to select the “Merge” option to add the contents of this Container file to your existing Container.
- Preview and confirm that what you are importing is correct and won’t affect your current setup. This will show you how many tags, triggers, variable and templates will be “New”, “Modified” or “Deleted”. You can click on “View Detailed Changes” to see precisely what will happen when you confirm changes.
- Once you are happy with your selections you can then click on “Confirm” to initiate the import.
IV. Transferring GTM Containers
To transfer GTM containers between collaborators or accounts, follow these steps:
A. Sharing Exported Containers with Collaborators
- Share the exported container JSON file with your collaborators through a secure file sharing method. This allows them to import the container into their own GTM accounts.
B. Importing Containers from Shared Files
- Your collaborators can import the shared container JSON file into their GTM accounts by accessing the Admin section, selecting “Import Container,” and following the prompts to import the shared container (as explained above).
V. Conclusion
Importing and exporting GTM containers is essential for efficient management and collaboration in tracking configurations. By following the steps outlined in this guide, you can seamlessly import containers from other accounts, export containers for backup or sharing purposes, and transfer GTM setups between collaborators.
Make use of these features to streamline your GTM workflow and ensure smooth transfer of tracking configurations.