Are you looking for a convenient way to share your Looker Studio reports on a regular basis? Setting up scheduled email delivery in Data Studio enables you to automate the distribution of reports to key recipients, saving you time and effort in manual report sharing.
In this tutorial, I’ll walk you through the steps to set up scheduled email delivery in Looker Studio, empowering you to deliver valuable data insights to your audience with ease.
- I. Introduction
- II. Configuring Scheduled Email Delivery
- III. Selecting Recipients
- IV. Customising Email Settings
- V. Choose Which Pages To Include
- VI. Setting the Delivery Schedule
- VII. Adjust Filters
- VIII. Confirming and Testing
- IX. Conclusion
I. Introduction
Automating the delivery of reports through scheduled email delivery in Looker Studio streamlines the reporting process and ensures timely distribution of insights.
II. Configuring Scheduled Email Delivery
To enable scheduled email delivery for your reports, follow these steps:
A. Accessing the Report
Open the report you want to schedule for email delivery in Looker Studio.
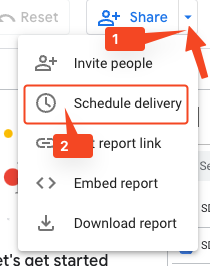
B. Enabling Scheduled Email Delivery
Navigate to the toolbar and click on the arrow to the right of the “Share” button. In the sharing settings, select “Schedule email delivery” and proceed to configure the email settings.
III. Selecting Recipients
Choose the recipients who will receive the scheduled reports:
A. Adding Recipients
Enter the email addresses of the recipients you want to include in the delivery. You can add multiple recipients by separating their email addresses with commas.
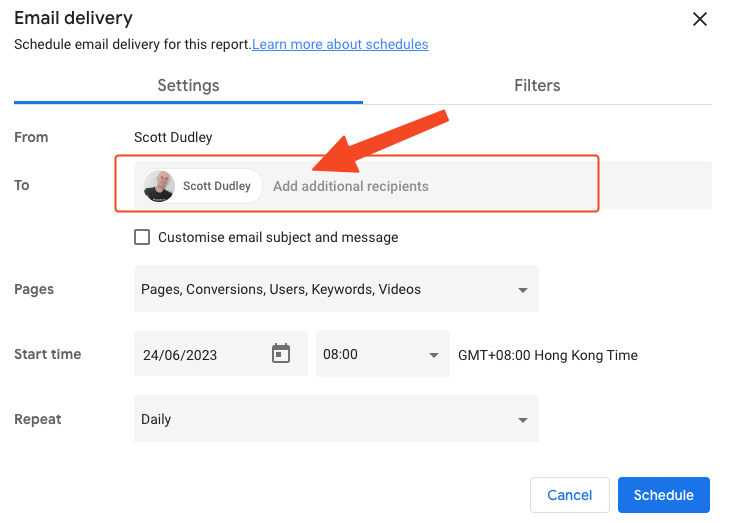
B. Managing Recipients
You can edit or remove recipients from the delivery list as needed.
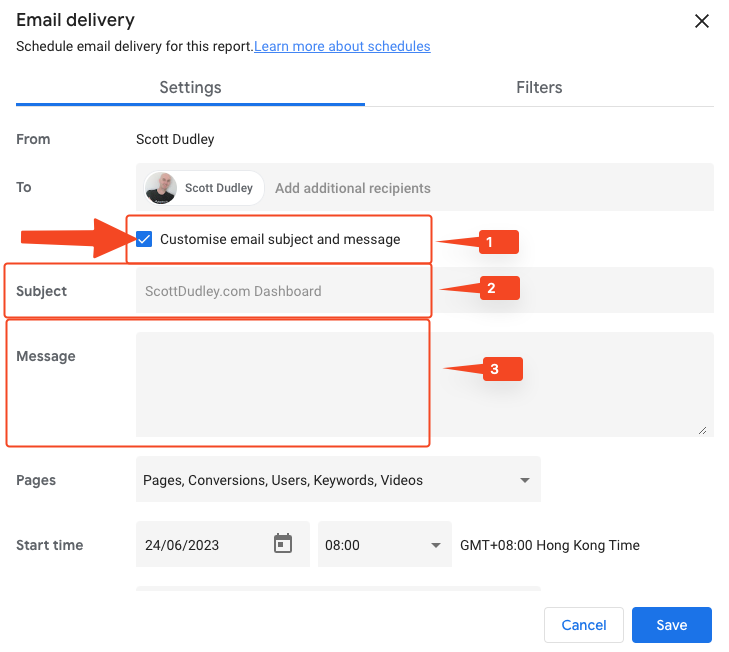
IV. Customising Email Settings
If desired, customize the email settings to provide context and enhance the delivery of your reports:
A. Subject and Message
- Check the box for “Customize email subject and message”
- Craft a concise and informative subject line.
- Include a message to provide additional context or instructions to the recipients.
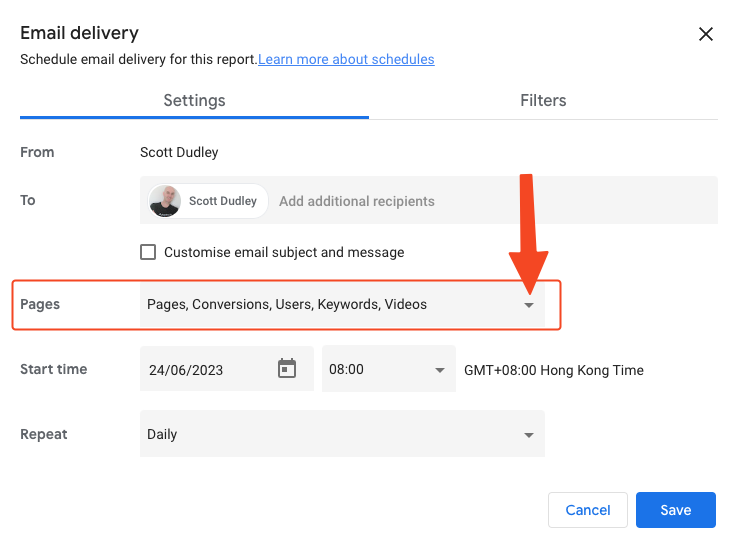
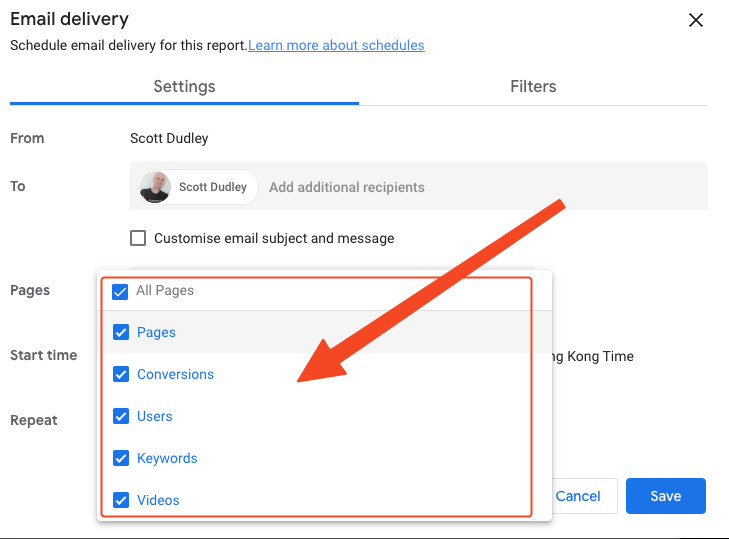
V. Choose Which Pages To Include
- Click on the down arrow to the right of the “Pages” option
- Select or de-select the pages you want to include in the email
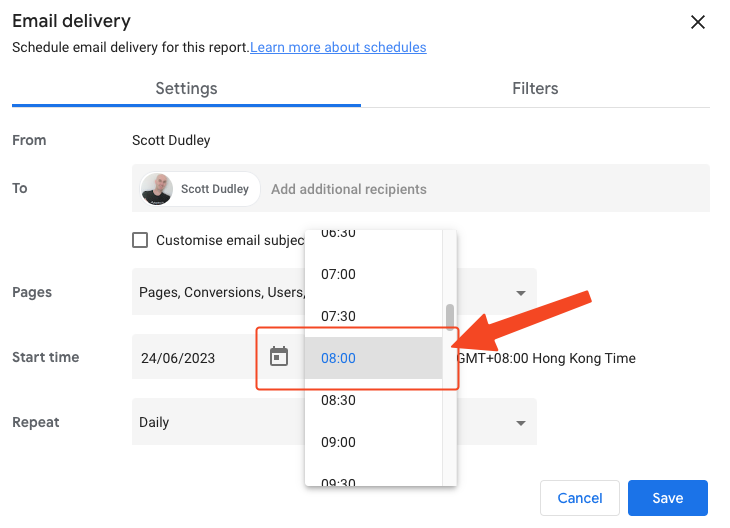
VI. Setting the Delivery Schedule
Configure the delivery schedule for your reports:
A. Frequency
Select the frequency at which the reports will be sent, such as daily, weekly, or monthly.
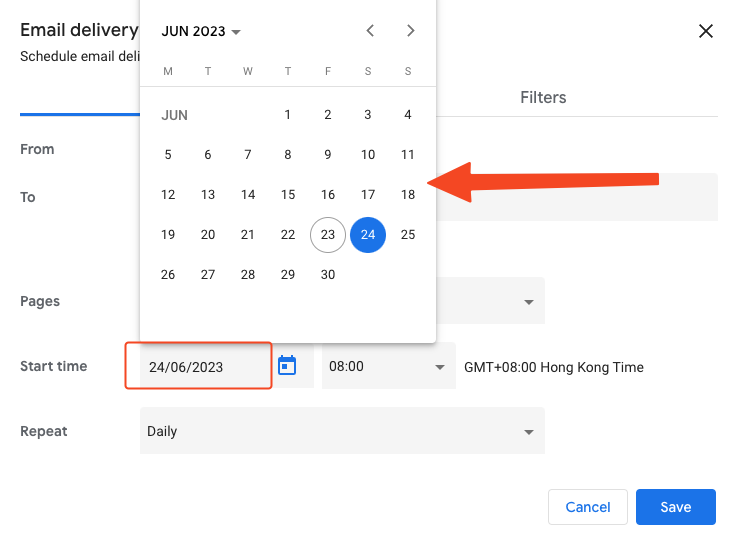
B. Timing
Choose the specific time of day for the scheduled delivery.
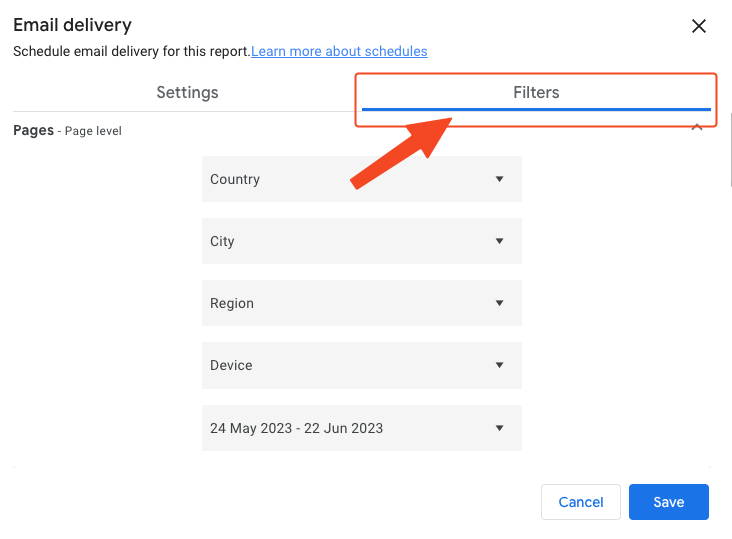
VII. Adjust Filters
You can also filter the information that is sent based on the available filters you have set up on each page
- Choose the “Filters” tab at the top.
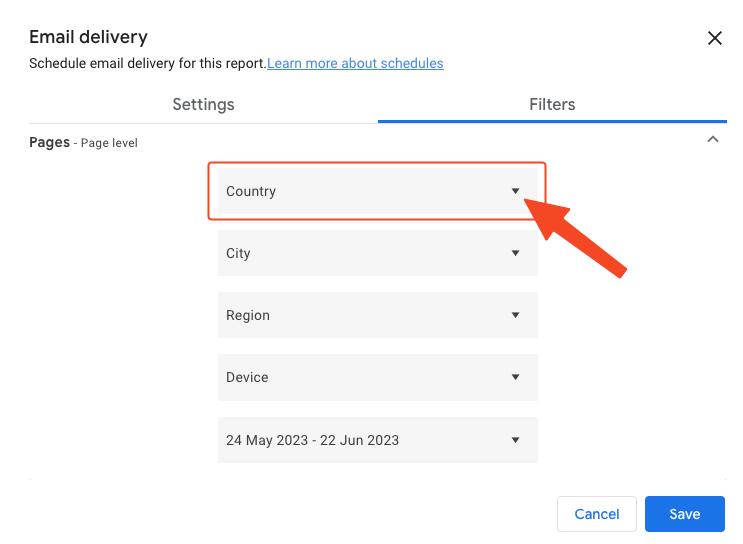
- Select the arrow next to the desired page.
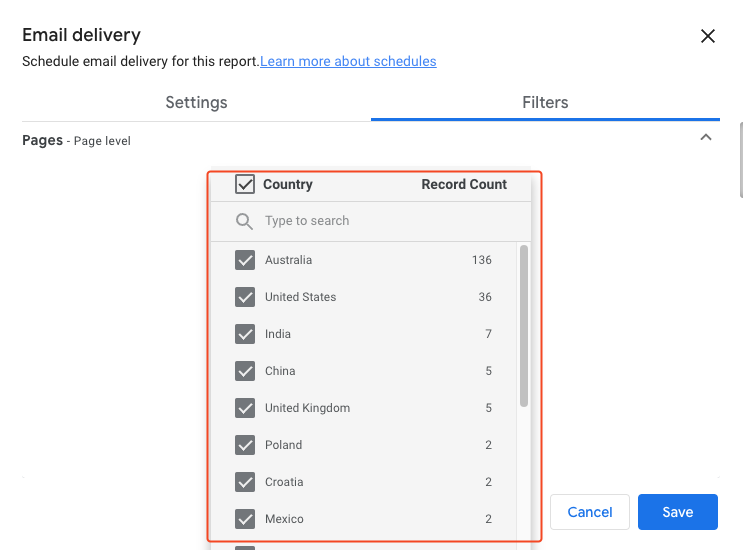
- Select or de-select the filters to include for that page.
- Rinse and repeat for the rest of the pages.
VIII. Confirming and Testing
- Review the email settings and delivery schedule to ensure accuracy.
- Send yourself a test email first to verify that the email is delivered correctly to the specified recipients.
- Once satisfied all settings are correct, click on the “Save” button to complete the scheduled email delivery.
- You can always come back and edit these settings whenever necessary.
IX. Conclusion
By setting up scheduled email delivery in Looker Studio, you can automate the process of sending reports, saving time and ensuring timely delivery of insights.
Follow the steps outlined in this guide to configure scheduled email delivery, select recipients, customize email settings, and establish a delivery schedule. Embrace the power of automation and streamline your reporting workflow in Looker Studio.